New DPIA (Detailed)
24. New DPIA (Detailed)
New DPIA (Detailed) feature allows users to create and manage new DPIA in the My Risk Assessor app. With the New DPIA feature, users have the ability to perform tasks such as creating new DPIA profiles, providing relevant information, and managing their interactions within the app. This feature helps users organize and keep track of DPIA more effectively.
- From the My DPIA module, click New DPIA to view the screen shown below.
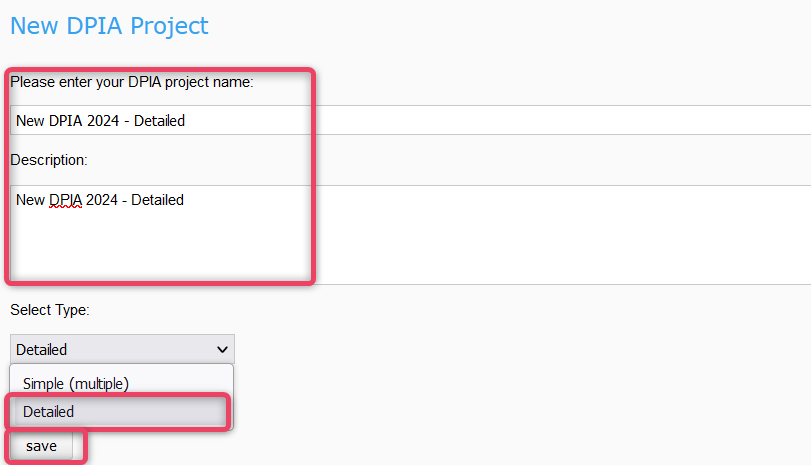
- Enter the DPIA list name and some adequate description.
- Choose the Detailed option from the drop down list.
- Click Save to create DPIA record and move to the next screen as shown below.
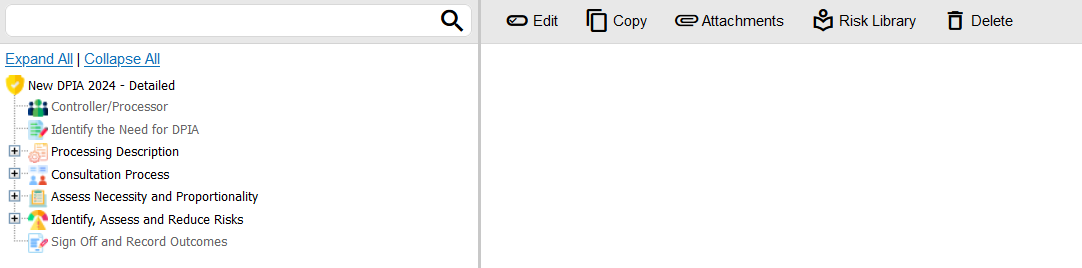
24.1 Controller / Processor Section
-
In the Controller / Processor section, users can add new DPIA Controller or a new DPIA Processor.

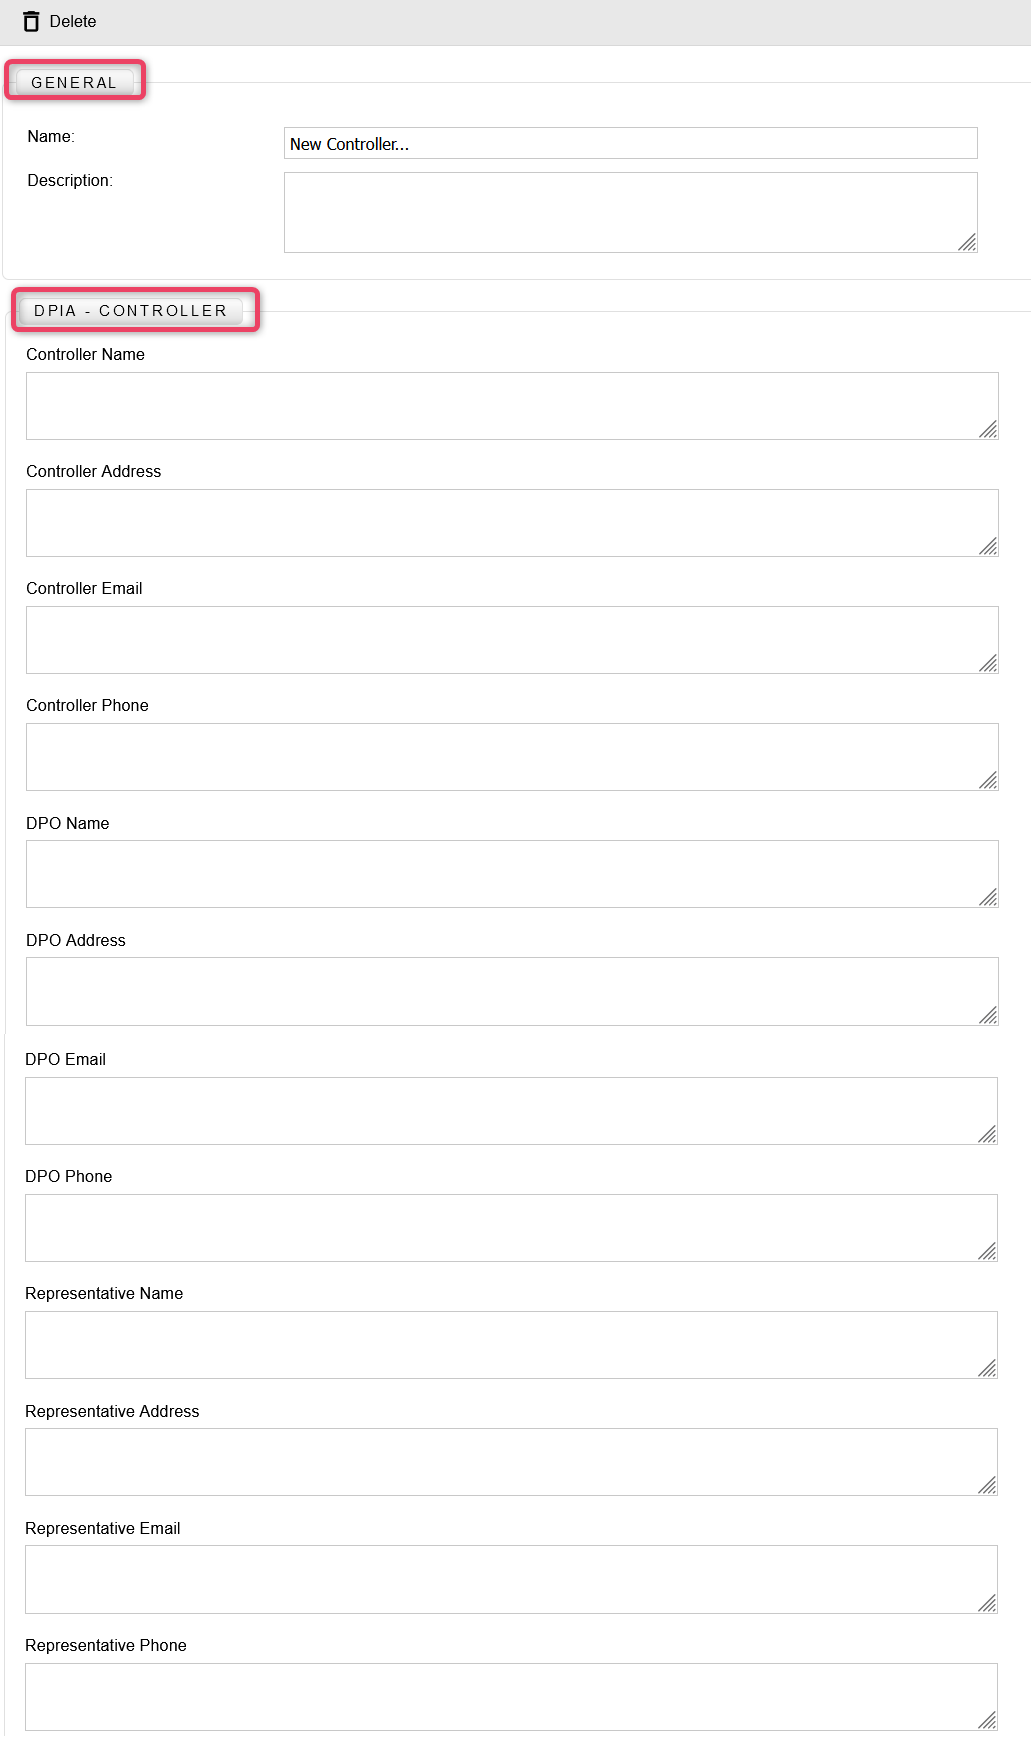
24.1.1 New Controller
-
From the Controller / Processor section, click the + Controller button to view the screen shown below.
-
Fill in the appropriate details as per the available options.
- To delete the selected record, click the Delete button.
24.1.2 New Processor
-
From the Controller / Processor section, click the + Processor button to view the screen shown below.
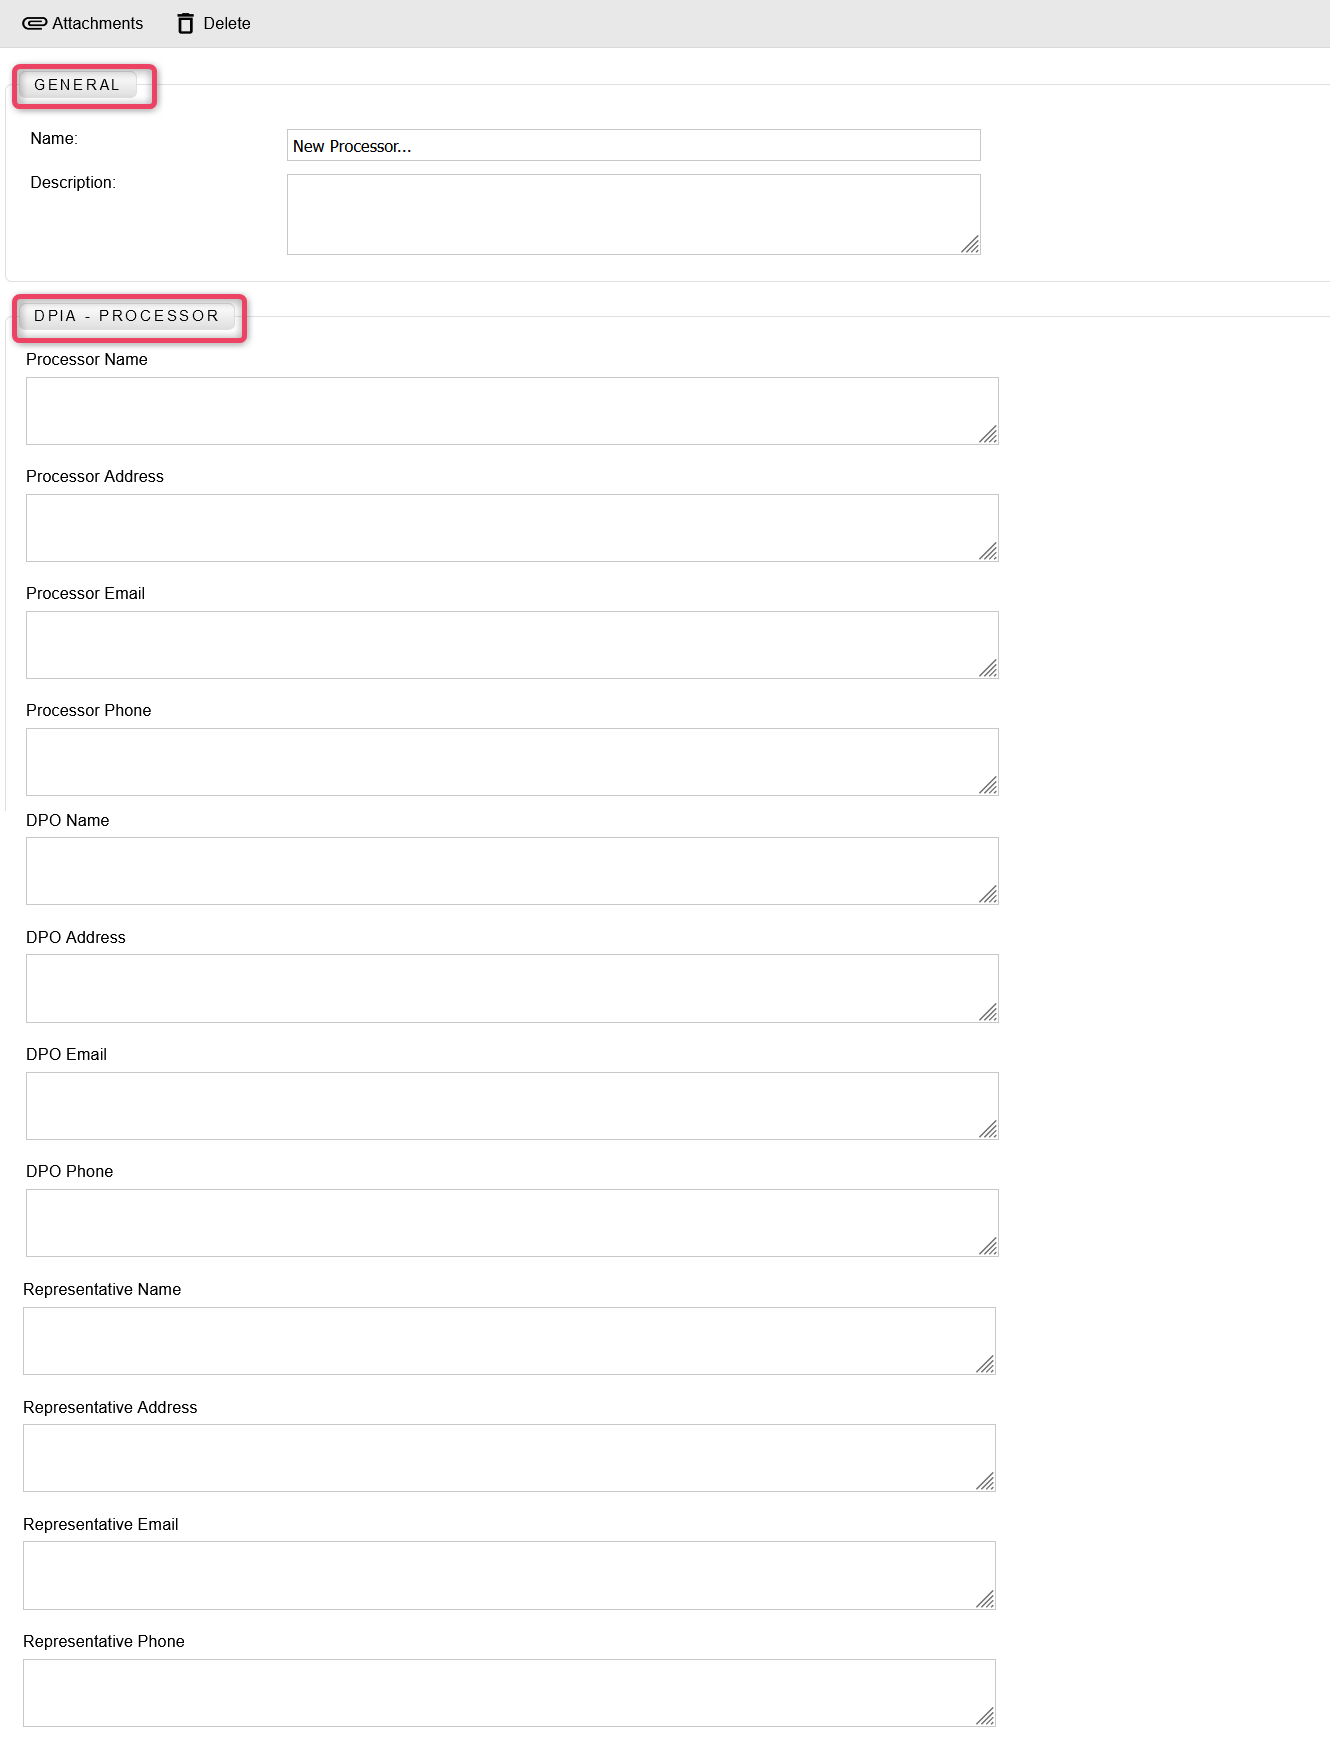
-
Fill in the appropriate details as per the available options.
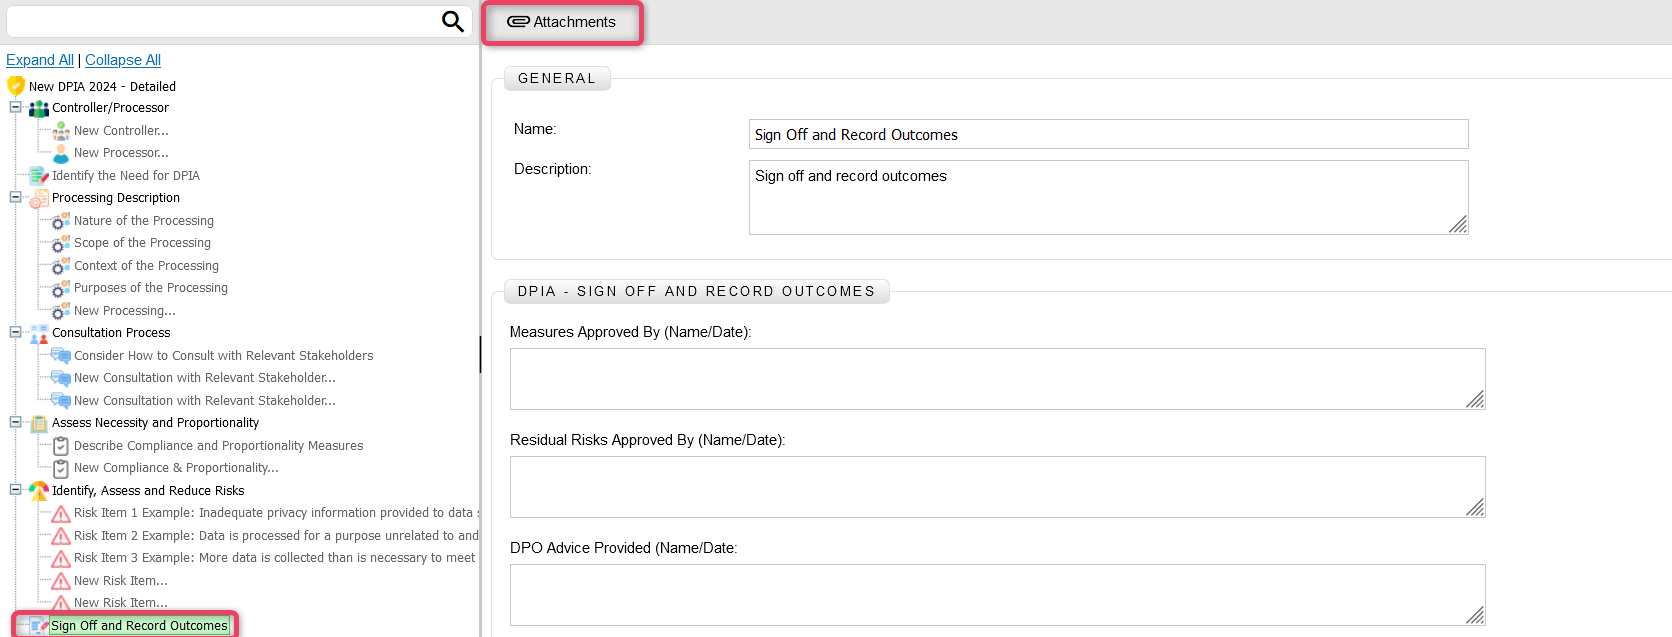
- For attachments, click the Attachment button.
- To delete the selected record, click the Delete button.
24.2 Identify the Need for DPIA Section
-
In the Identify the Need for DPIA section, users can add DPIA - Identification information.
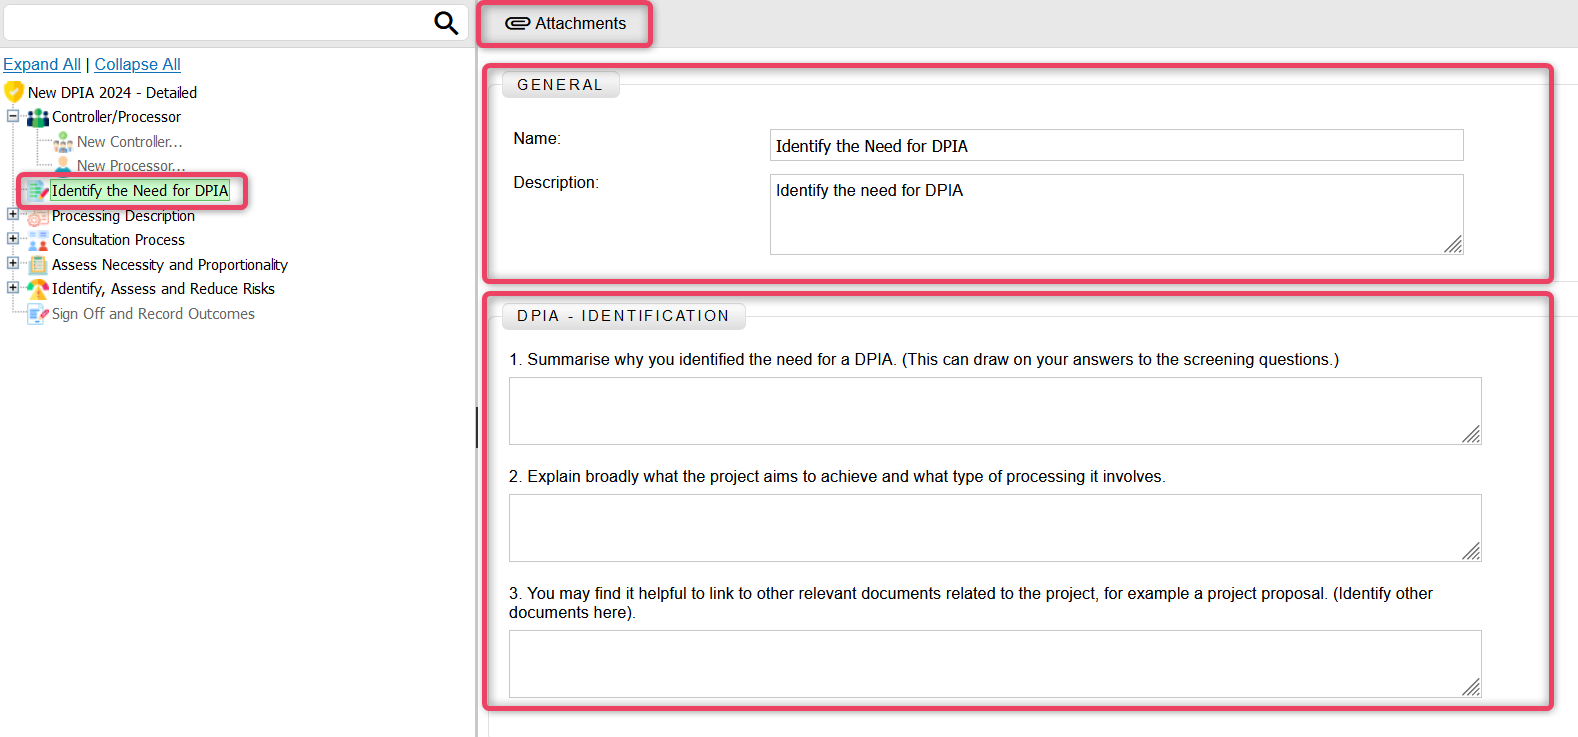
-
Fill in the appropriate details as per the available options.
- For attachments, click the Attachment button.
24.3 Processing Description Section
-
In the Processing Description section, the system automatically adds the pre-defined processing descriptions i.e., Nature, Scope, Context and Purpose of Processing. Users can add more descriptions as per need.
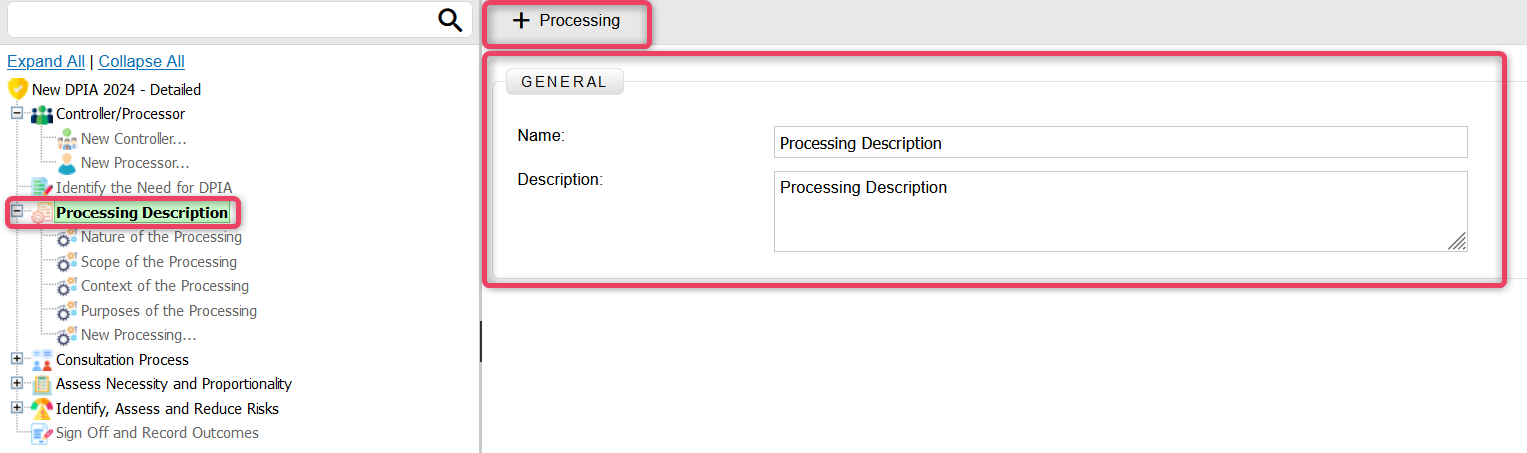
24.3.1 New Processing
-
From the Processing section, click the + Processing button to view the screen shown below.
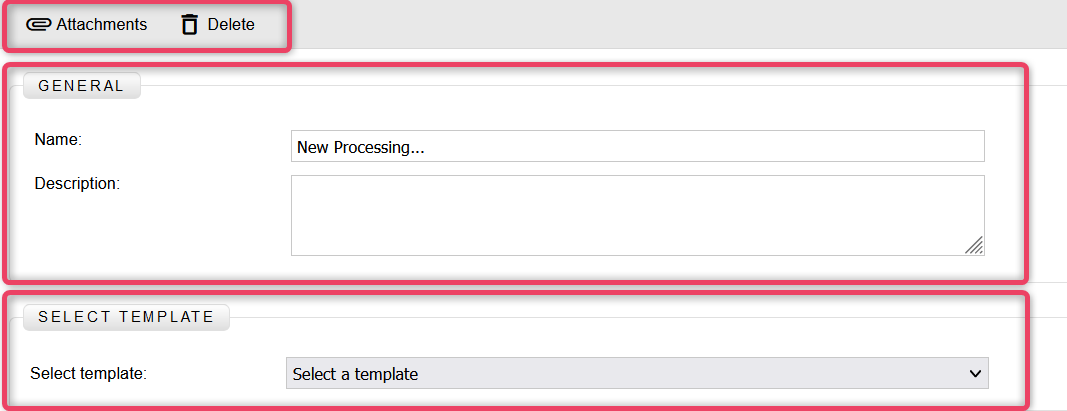
-
Select the appropriate template from the Select Template drop down option.
- Based on the selected template, the system will display the appropriate options.
- Fill in the appropriate details as per the available options.
- For attachments, click the Attachment button.
- To delete the selected record, click the Delete button.
Information
- The pre-defined processing descriptions i.e., Nature, Scope, Context and Purpose can also be edited in the same manner.
24.4 Consultation Section
-
In the Consultation section, the system allows adding Consultation details as per need.
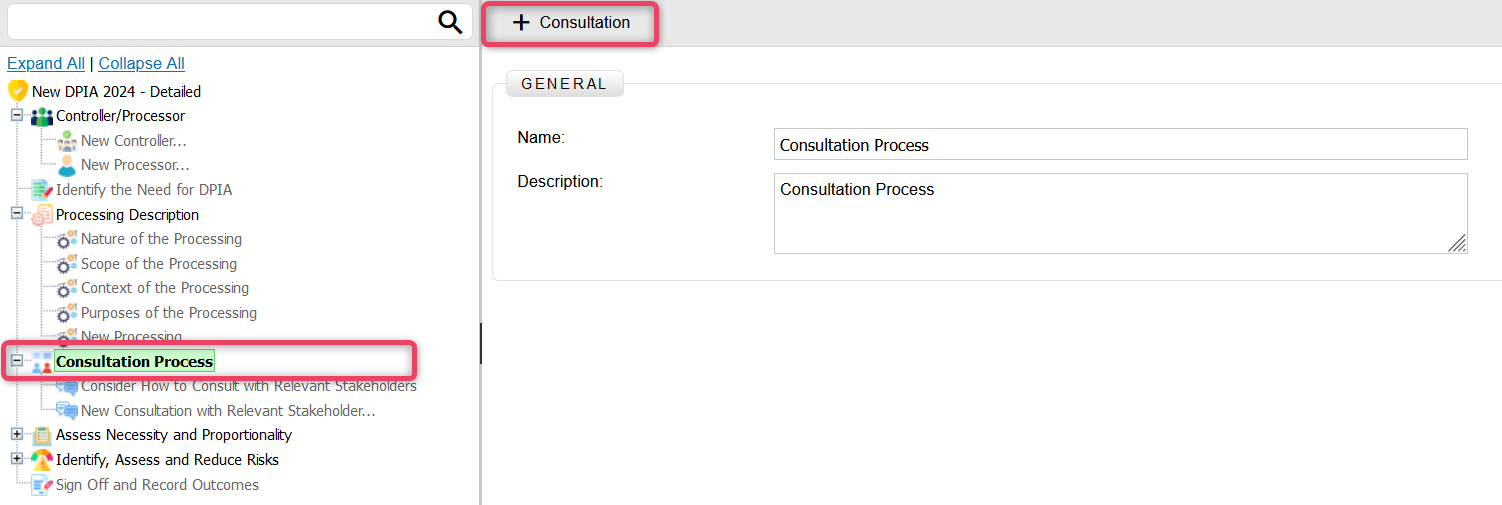
24.4.1 New Consultation
-
From the Consultation section, click the + Consultation button to view the screen shown below.
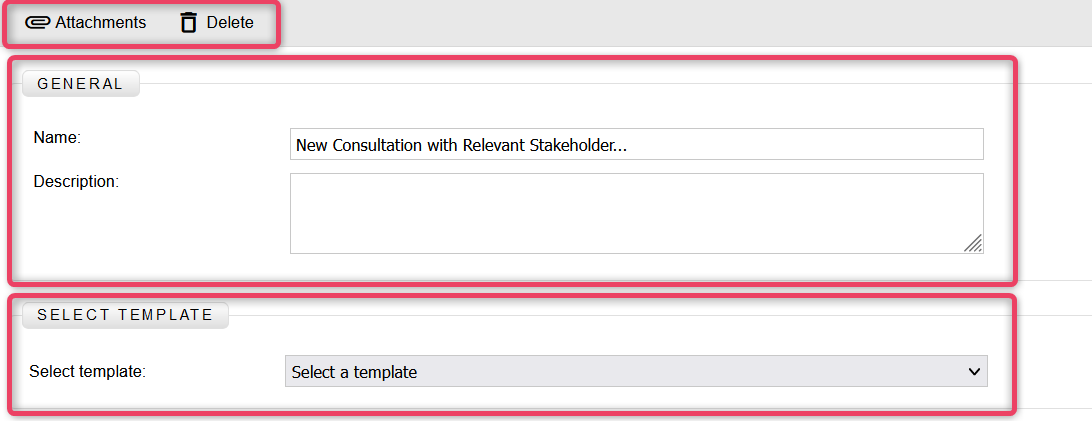
-
Select the appropriate template from the Select Template drop down option.
- Based on the selected template, the system will display the appropriate options.
- Fill in the appropriate details as per the available options.
- For attachments, click the Attachment button.
- To delete the selected record, click the Delete button.
24.5 Assess Necessity Section
-
In the Assess Necessity section, the system allows adding Assess Necessity details as per need.
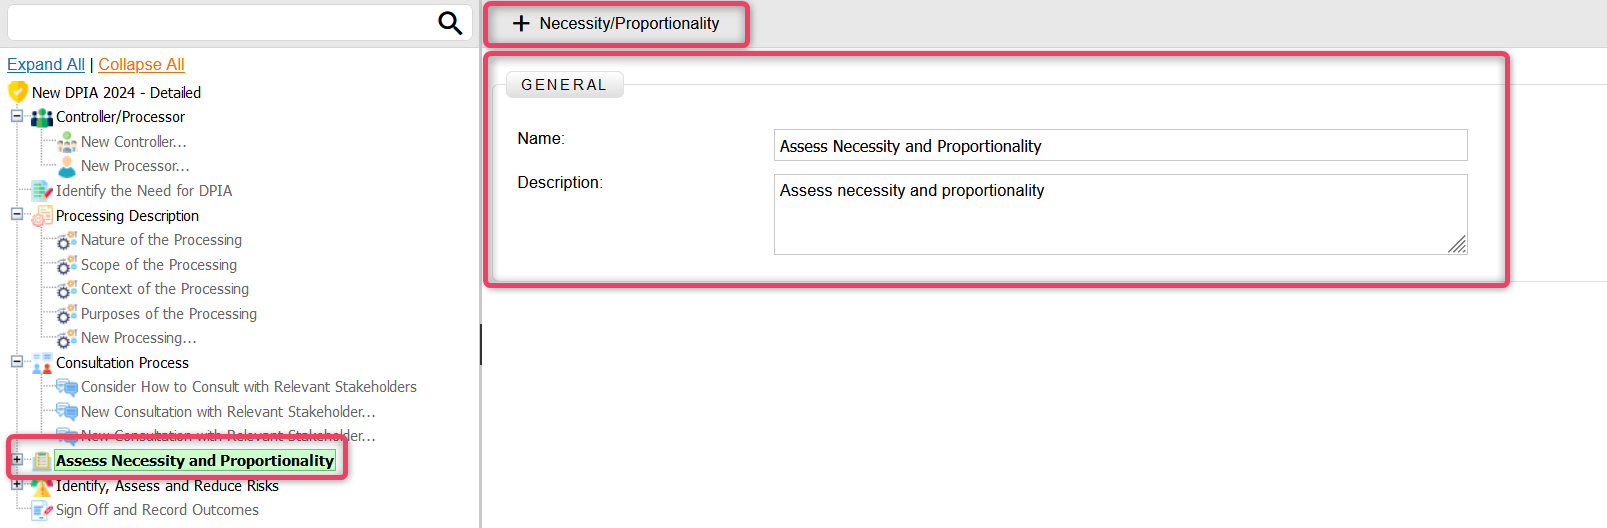
24.5.1 New Necessity/Proportionality
-
From the Necessity/Proportionality section, click the + Necessity/Proportionality button to view the screen shown below.
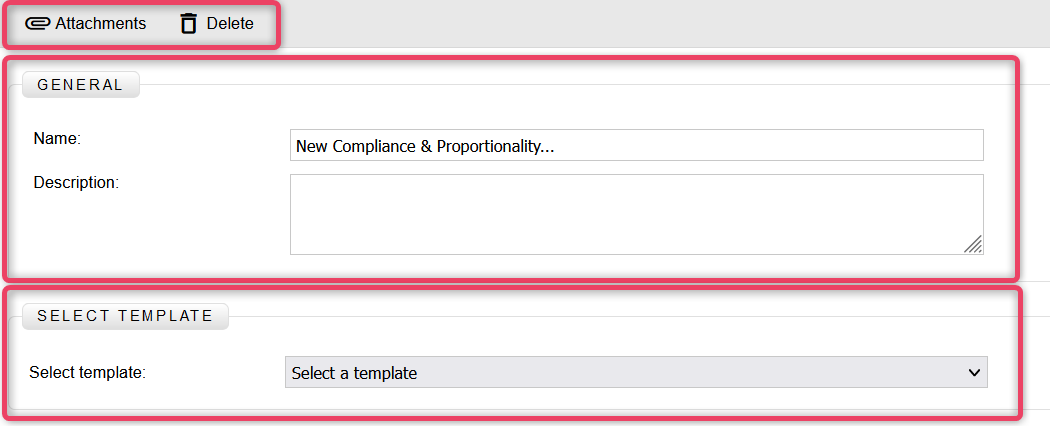
-
Select the appropriate template from the Select Template drop down option.
- Based on the selected template, the system will display the appropriate options.
- Fill in the appropriate details as per the available options.
- For attachments, click the Attachment button.
- To delete the selected record, click the Delete button.
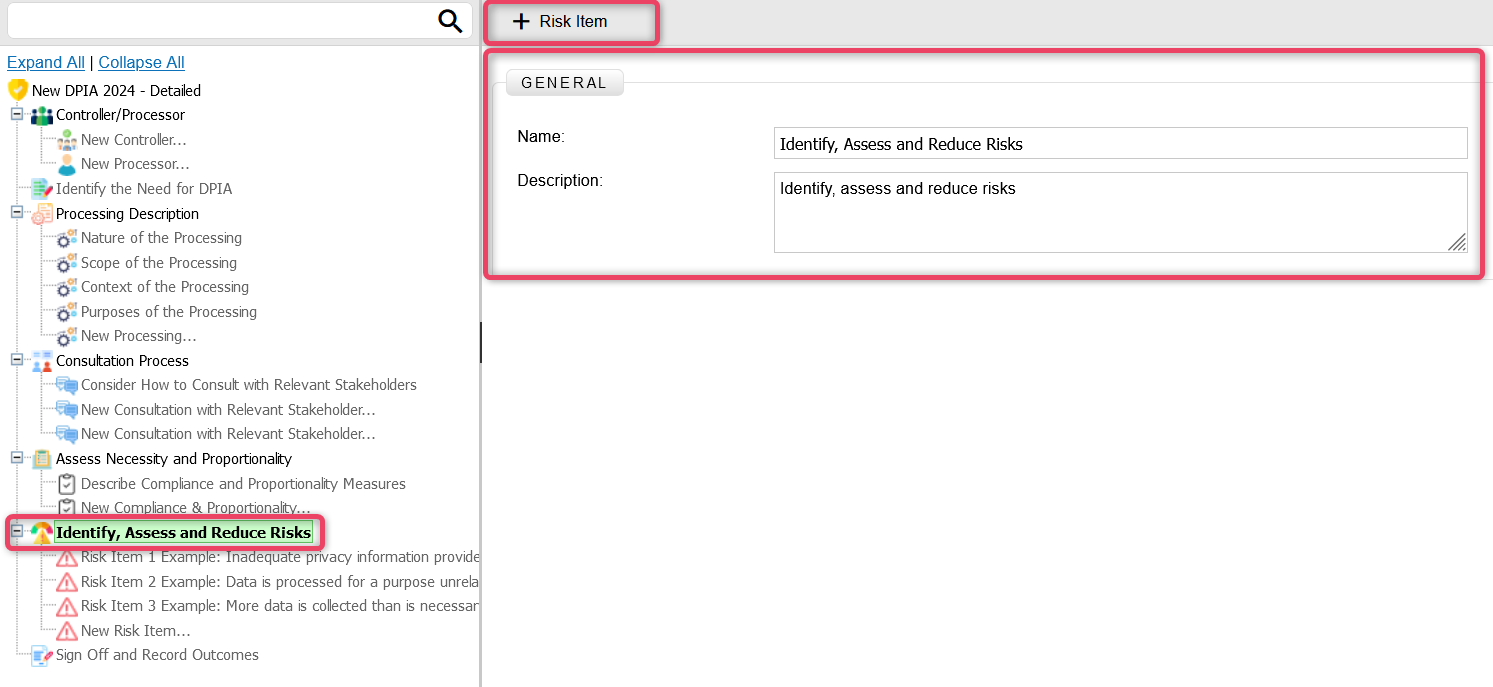
24.6 Identify, Assess and Reduce Risks Section
-
In the Identify, Assess and Reduce Risks section, the system allows adding new details as per need.
24.6.1 New Risk
-
From the Identify, Assess and Reduce Risks section, click the + Risk button to view the screen shown below.
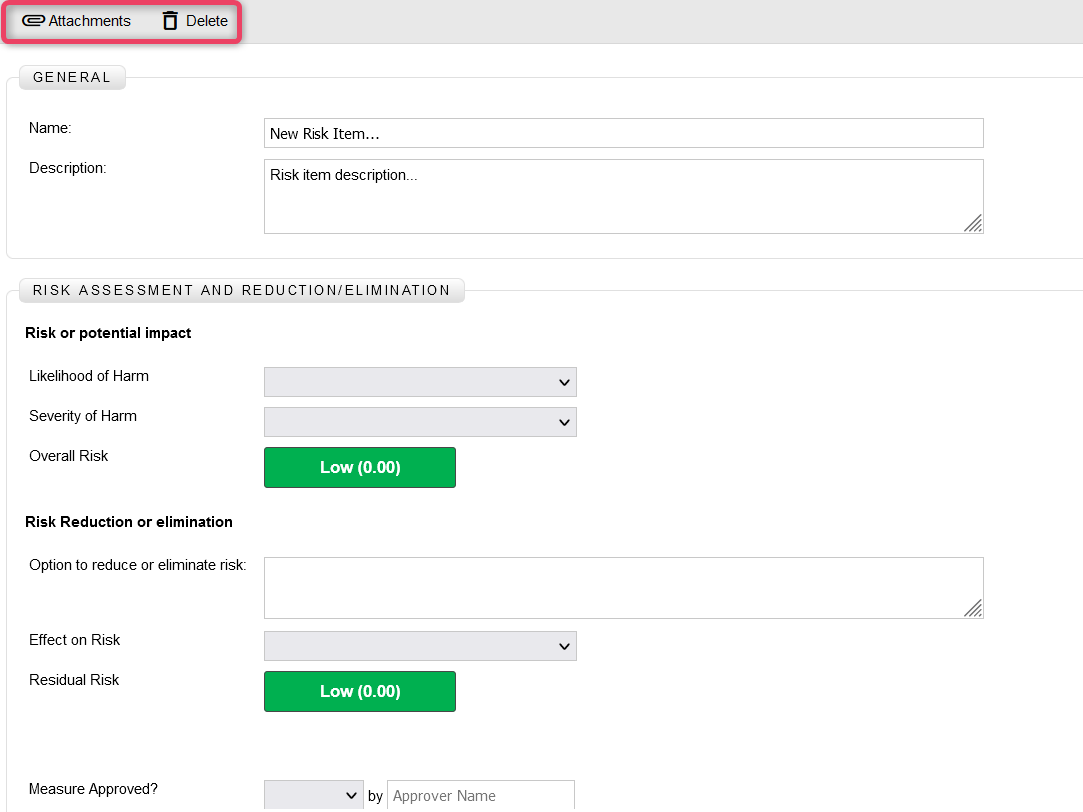
-
Fill in the appropriate details as per the available options.
- For attachments, click the Attachment button.
- To delete the selected record, click the Delete button.
24.7 Signoff Section
-
In the Signoff section, the system allows adding new signoff details as per need.