Open Threat Library
5. Open Threat Library
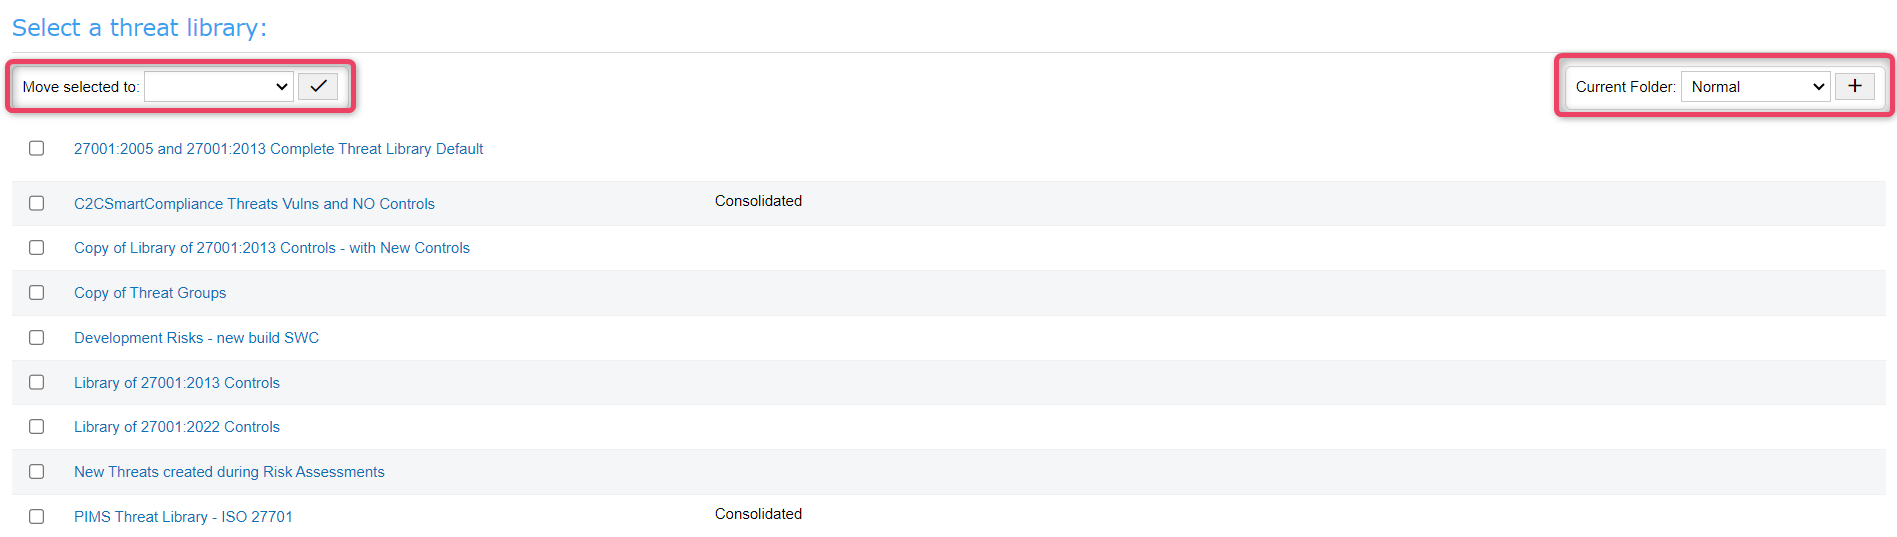
The Open Threat Library feature lists all threat libraries and allows users to view archive lists or normal lists by choosing the appropriate option from the Current Folder dropdown. Also, users can select and move any particular threat list to either archive or normal as per need. User can also click on a threat list to view details of the selected threat list.
-
Navigate to My Assets and click the Open Threat Library option to open a new screen as shown below.
-
To view archive list of threats, choose the archive option from from the Current Folder dropdown. The system will reload all the archive threat list.
-
Select an threat list, and choose the option archive under the Move selected to dropdown, to move selected to archive.
-
Click an threat list to view a detailed structure wise threat listing as shown below.

5.1. Search Bar
-
The search bar provides quick searching functions. To search records, simply type in the search phrase and click the the search button to filter the records accordingly.

-
If more than one results are found the search bar changes to the results bar as shown below.

-
To view the previously matched result, click the prev button.
- To view the next matched result, click the next button.
- To close the results bar and return to search bar, click the search again button.
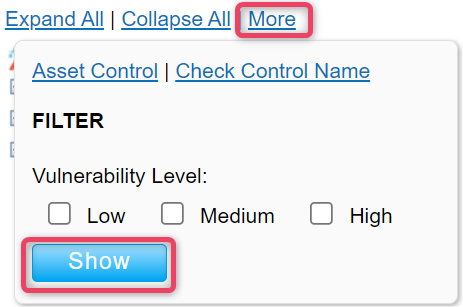
5.2. Utility Bar
-
The utility bar provides quick viewing functions by enabling expand all, collapse all and filtration and searching options. Simply type in the search phrase and click the search button to filter the records accordingly.

-
To expand the list, click the Expand all button.
- To collapse the list to default view, click the collapse all button.
-
To view additional option, click the more button, to view the option screen shown below.
-
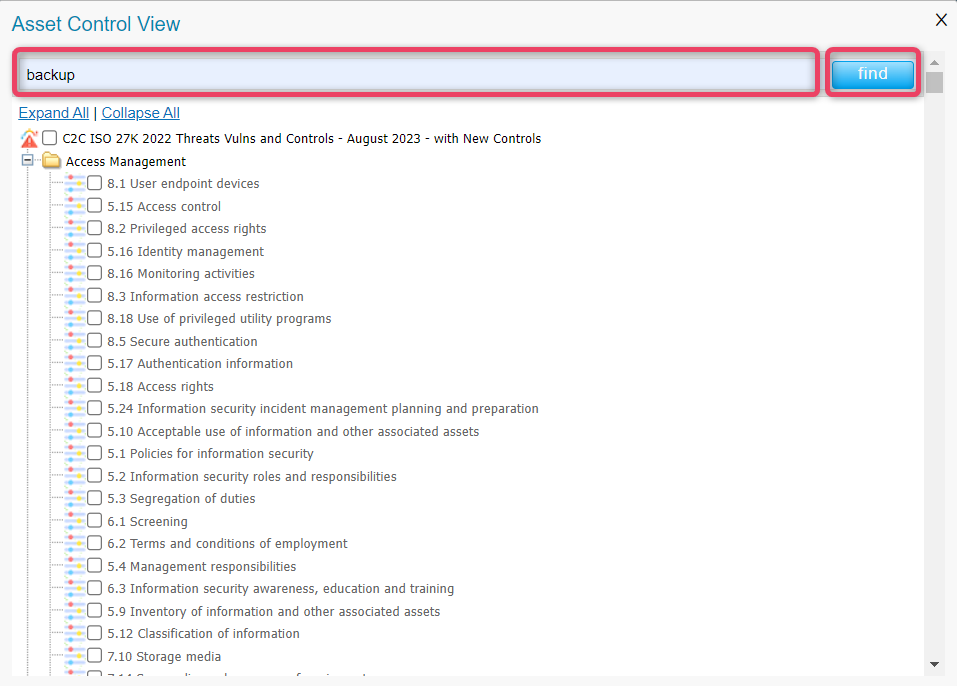
Asset Control button opens a new search dialog Asset Control view, that allows to search and filter assets. See screen below for reference.
Information
- Enter the search phrase and click the find button to search records.
- To view the previously matched result, click the prev button.
- To view the next matched result, click the next button.
- To close the results bar and return to search bar, click the search again button.
-
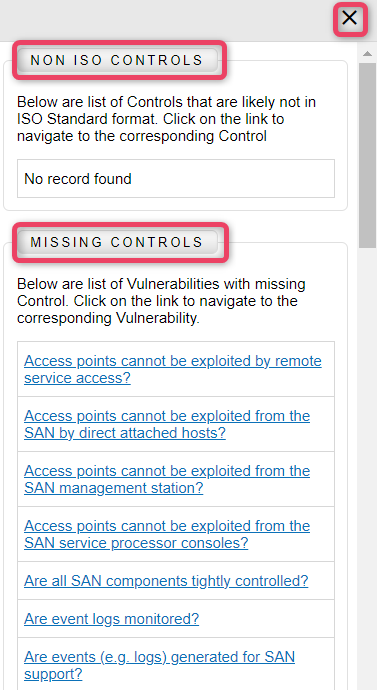
Check Control Name button opens a new panel displaying the Non-ISO controls and Missing Controls. This gives a summarized view to quickly note which controls are missing and which of the Non-ISO controls are implemented in this threat listing. See screen below for reference.
Note
- Click the control name to view details.
-
Vulnerabilities button opens a new panel displaying the Vulnerabilities that match the search criteria. Users can search vulnerabilities by selection either or all of the filter options i.e., Low, Medium, High.
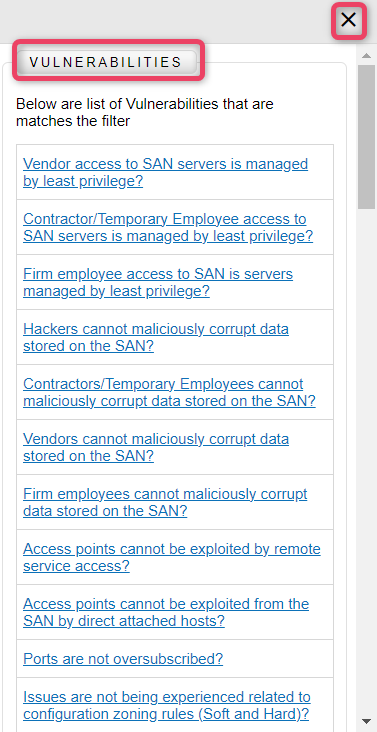
Note
- Click the vulnerability to view details.
5.3. Navigation Bar
-
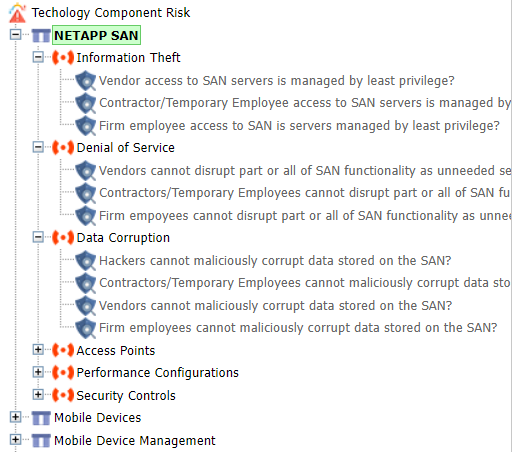
The navigation bar provides a hierarchial view of all Threat Libraries, Threats, Vulnerabilities & Controls.
Note
- Please refer to utility bar for information on more options.
5.4. Action Bar
- The action bar provides a available actions against the item selected from the Navigation bar.
Action Bars shown If an threat List is selected from the Navigation bar

Action Bars shown If an Threat Group is selected from the Navigation bar

Action Bars shown If a Threat is selected from the Navigation bar

Action Bars shown If an Vulnerability is selected from the Navigation bar

Information
- Please refer to New Threat Group for information on more options.
- Please refer to New Threat for information on more options.
- Please refer to New Vulnerability for information on more options.
- Please refer to New Control for information on more options.
5.4.1 Edit
-
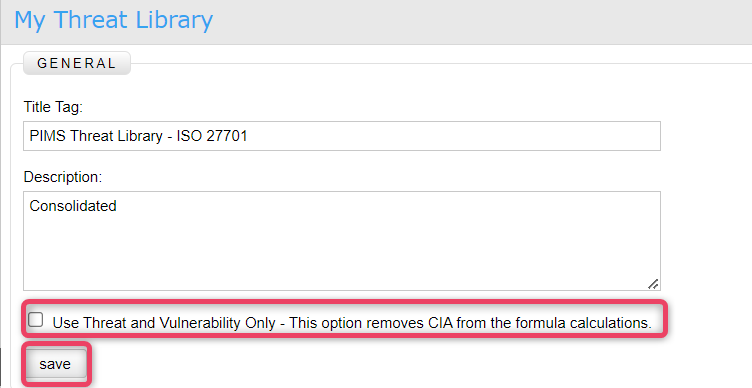
The edit action allows to edit the information of the threat list. Click the Edit button to view the screen shown below.
-
To only use threats and vulnerabilities check the option otherwise leave it unchecked.
- Update the information as needed and once done, click the save button to save the changes and return to the previous screen.
5.4.2 Delete
-
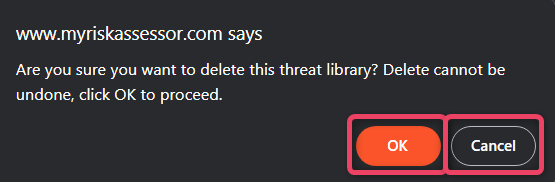
The delete action allows to delete the the whole tree. Click the Delete button to view the screen shown below.
Important
- The delete action cannot be undone.
- To export the threat list to a xml file, click the Export to XML option.
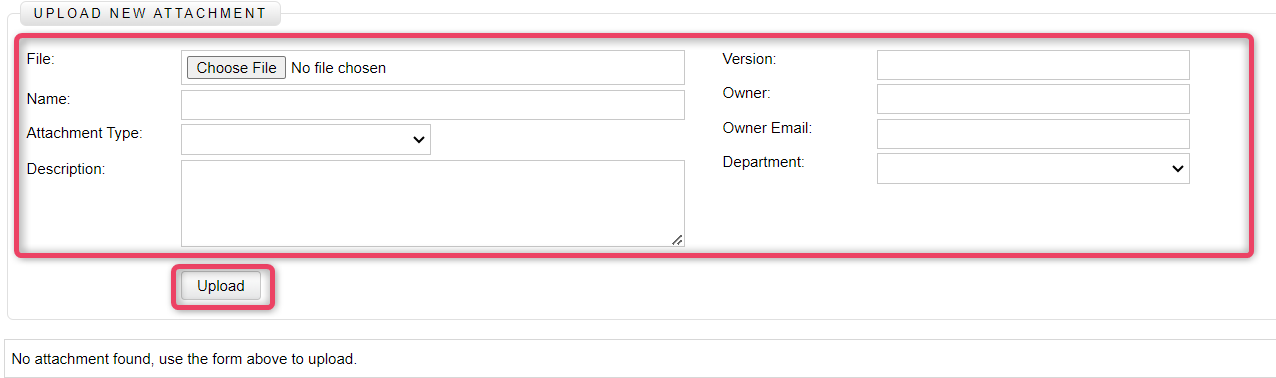
5.4.3 Attachment
-
The attachment action allows to attach multiple attachments with the whole tree. Click the Attachment button to view the screen shown below.
-
Browse to the required file, and attach the file to the tree.
- Fill in all required fields.
- Once complete, click the Upload button to upload the attachment.