New Sub Asset
New Sub Asset
New Sub Asset feature allows users to create and manage Sub assets under an already define Asset in the My Risk Assessor app. With the New Sub Asset feature, users get same flexibility to define all details of an asset, alongside maintaining relationship between the assets. the ability to perform tasks such as creating New Sub Asset profiles, providing relevant financial information about the assets, and managing their interactions within the app. This feature helps users organize and keep track of assets more effectively.
Information
Sub assets are treated as individual Assets, with the difference being a parent Asset associated.
- Click New Sub Asset button from the top action bar, to open a new screen as shown.
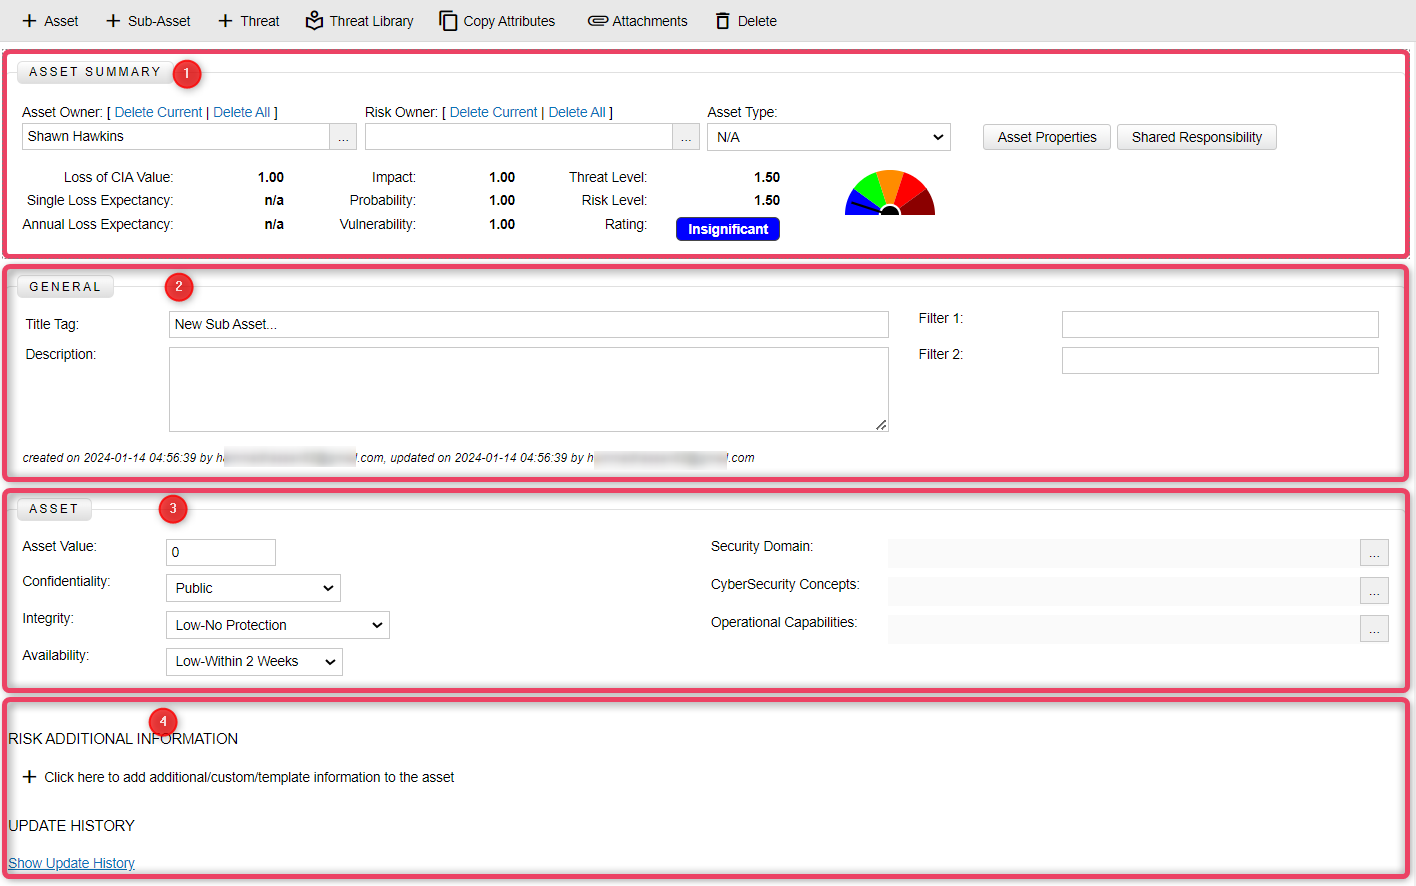
Sub Asset Summary Section
-
In the Sub Asset Summary section, overall summary of the New Sub Asset is shown.

-
Fill in the relevant information against Asset Owner, Risk Owner and Asset Type.
- The overall risk rating of the asset are automatically calculated.
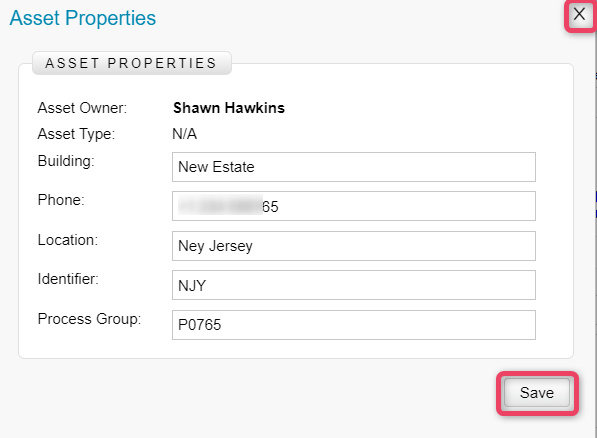
Asset Properties
-
Click Asset Properties to view the screen as shown below. Provide the relevant information and once complete, click Save to save the changes and return to the previous screen.
-
Click x to close this screen without saving any changes.
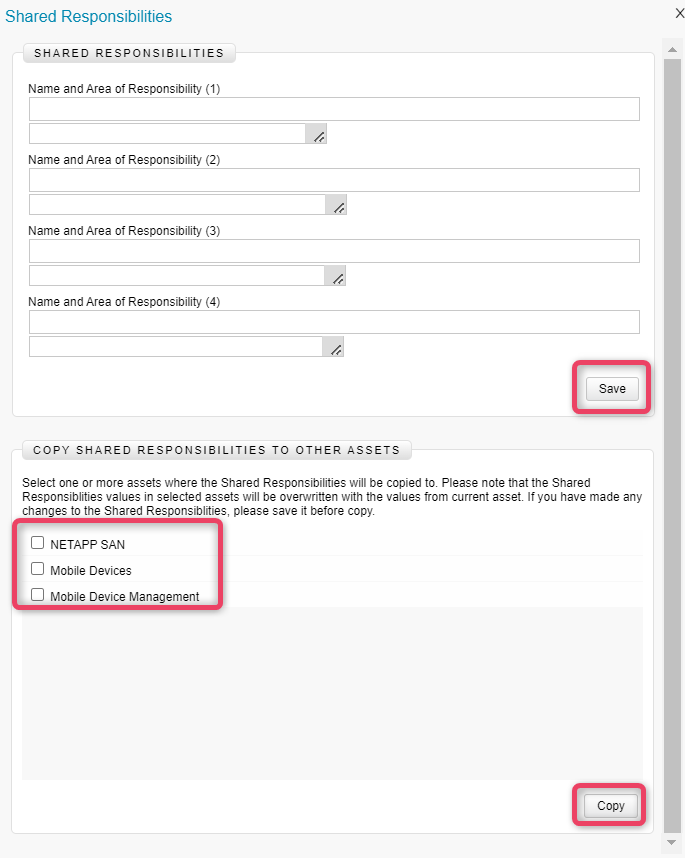
Shared Responsibility
-
Click Shared Responsibility to view the screen as shown below. Provide the relevant information and once complete, click Save to save the changes and return to the previous screen.
-
Click x to close this screen without saving any changes.
General Section
-
In the General section, general information about the new sub asset is maintained.

-
Fill in the relevant information against Title Tag, Description, Filter1 and Filter2.
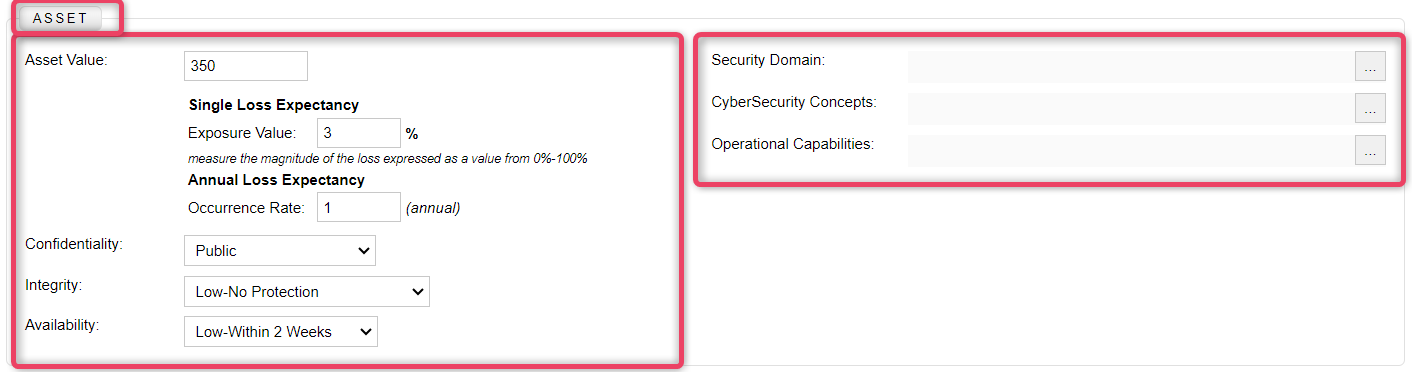
Asset Section
-
In the Asset section, the information security related attributes of the new sub asset are maintained.
-
Fill in the relevant information against Asset Value, Exposure Value and Occurrence Rate.
Additional Information Section
-
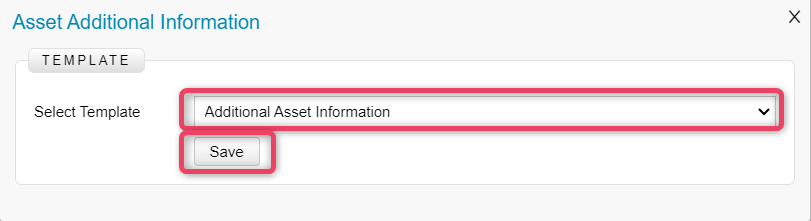
In the Additional Information section, you can select an additional risk information template and then provide details in accordance to the template.

Add Template
-
Click the Click here to add additional/custom/template information to the asset button to open the template selection screen as shown below.
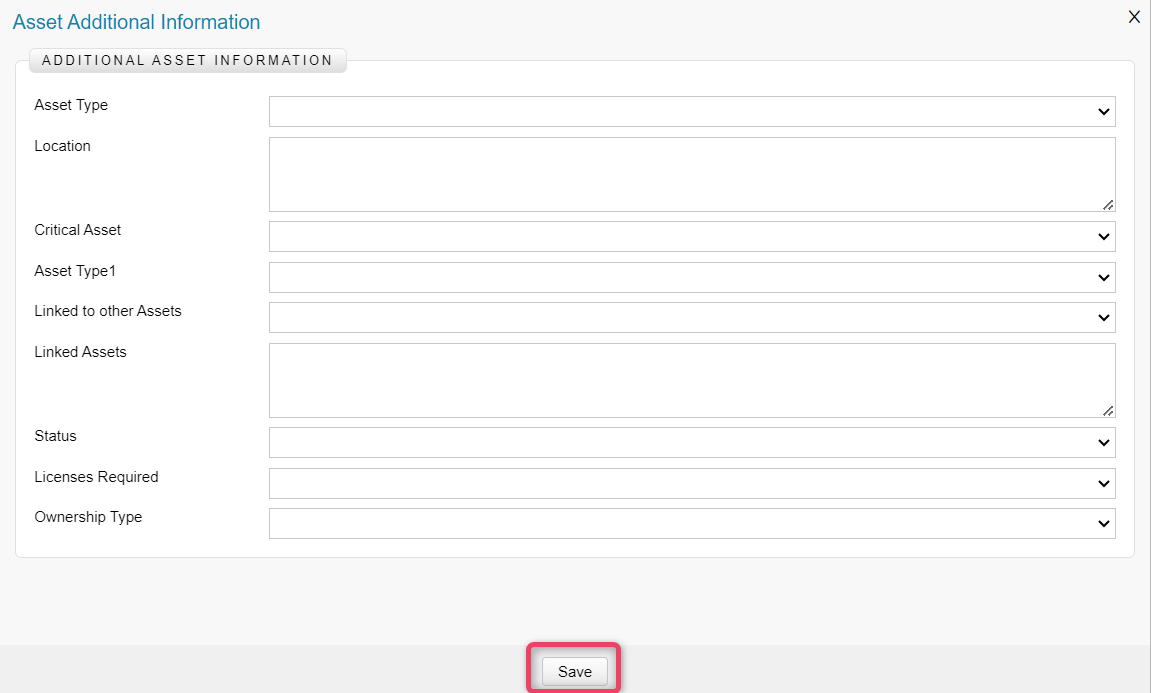
Fill Info
-
Provide the relevant information and once complete, click Save to save the changes and return to the previous screen.
-
Click x to close this screen without saving any changes.
-
Once done, you can add more detail records by clicking the Add New button as shown in the screen below.

- To edit a record, click the Edit button.
- To delete a record, click the Delete button.
Update History Section
-
In the Update History section, all changes made to the new sub asset are recorded for a secure audit trail. See the screen below for details.
